Saturday, September 30, 2017

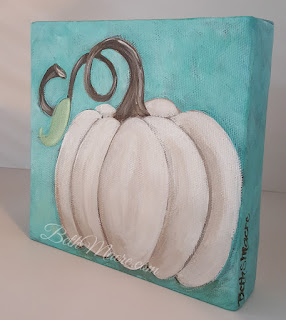
DIY Painted Pumpkin on Canvas

Some affiliate links are included below for supplies that I have used in this post.  

How to Paint a Pumpkin

For Art Teachers and Personal Use
I decided I needed a few more Fall decorations but I didn't want to spend too much, so I pulled out my paints and a canvas that I already had. I decided I would share my steps here in a tutorial. You can use the same colors that I used or you can use traditional fall colors if you prefer.

I have also included my line drawing of the pumpkin. You can download it here and trace it onto your canvas if you need to or you can draw your own pumpkin.

Supplies I used:
White Chalk Pencil (optional)
6"x 6" Canvas
Variety of Paintbrushes
Acrylic Paint
Colors I Used:
Master's Touch: Viridi, Titanium White, & Yellow Medium
Blickrylic Burnt Umber (Master's Touch also has a Burnt Umber)
See links below for some of the supplies I am using.

Step 1 - Preparing the canvas
Paint the entire canvas with a thin coat of Burnt Umber (brown). I always paint the canvas with a contrasting, but complementary color. This prevents the white of the canvas from showing through. It also adds some interest to the layers of paint.

Step 2 - Drawing
Draw the outline of the pumpkin using the white chalk pencil. Download my sketch here.
You can use a regular pencil, but I like the white chalk pencil because it can easily be erased to make corrections, and the white shows up on the dark background.
Transferring the drawing - You can freehand draw the pumpkin OR transfer my drawing onto your canvas. You can use the chalk pencil to color on the back of the printed line sketch then trace over the line drawing. If you do not have a chalk pencil or a piece of chalk you could use carbon tracing paper.

Step 3 - Background
Using the aqua blue (Master's Touch Viridi) color and a thin liner brush, I painted around the outside edge of the pumpkin. Then I used a wider brush to fill in the entire background and sides of the canvas with the turquoise blue. I add white (Titanium white) paint to my brush to add highlights to the brushstrokes.
Tips:
I leave the brushstrokes to add texture.
After the first layer dries I go over the background again with another layer of color allowing some of the first layer to show through in places. This adds depth to the background and covers most of the brown surface.

Step 4 - Pumpkin
I mix white with a little Burnt Umber (brown) in two or three shades of off-white. Using the darkest shade, I use a thin brush to outline the edge of the pumpkin. Then using the lighter shade of white+brown mixture (mostly white), I fill in the sections of the pumpkin leaving the darker outlines showing. (I go back later to finish the white parts and add more shading.)

Step 5 - Stem
Using the Burnt Umber (brown), I use a thin brush to paint the stem of the pumpkin. While the paint is still wet I dip the same brush into the off-white paint and paint streaks onto the stem to create the ridges. These ridges are usually not perfectly straight. They kind of twist on the stem like a candy cane stripe. Alternate between the brown and the off-white, using more brown, making sure the two colors partially mix and do not leave solid stripes.

Step 6 - Leaf
The leaf is optional. You can leave it off if you just want the stem.
Mix a little yellow and off-white paint with the aqua blue (Master's Touch Viridi) that I used for the background to get a soft green. I wanted the color to be soft like the rest of the colors in the painting. I did not want a bright green. I used my thin brush to paint the outline of the leaf and then filled in the center with the same soft green color. After the first layer dried I added a highlight of a lighter shade of the same green on one edge of the leaf.

Step 7 - Pumpkin shading
After adding the stem and leaf details, the first layer of the pumpkin was dry, so I went back to add some shading. By adding shadows and highlights you can create the illusion of the round forms that you see on a pumpkin. Using a half-inch flat brush and the darker shade of off-white, I painted along the edge of one section of the pumpkin. While that paint was wet, I added a lighter shade of off-white. The two colors partially blend together. Use strokes that go up and down and follow the curve of the edges of the pumpkin. I also added some pure white paint strokes in the center of each section of the pumpkin. The lighter white creates highlights that come forward creating the illusion of form. Paint the lighter highlights in the middle and the same side of each section.
Repeat this step for each section of the pumpkin.
Tips for shading:
Shadows recede.
Highlights come forward.

Step 8 - Finish and touch-ups
Finally, look over your painting and darken any shadows that need it and add highlights where needed. More shading and highlights will add more dimension and depth to your pumpkin.
Go over any edges that need sharpening to avoid losing details.
Make sure all sides of the canvas are painted with the same brushstrokes used on the front of the canvas. The painted sides of the canvas look more finished and can be displayed without a frame.

Step 9 - Sign and Seal
Sign your art in an inconspicuous place.
I always sign my art but I don't like the signature to be a distraction so on this one I decided to paint my signature on the side edge. If there is room I usually paint it on the bottom right side corner.

To Seal or Not to Seal
An acrylic varnish or sealant will protect the painting and even out the sheen of the painting.
Some acrylic paints have a different sheen to them. Some are flat, some are glossy, some are somewhere in between. In order to even out the sheen all over the canvas, you can use an acrylic varnish. I like to use a spray-on varnish. There are both spray-on and brush-on that are good. I have used both with success.

Have fun and go paint a Pumpkin! 
I hope this is helpful to anyone who wants to paint a pumpkin. Please let me know in the comments below if this was helpful to you or your students or if you have any questions.


Mrs. Macre♥Art


Supply Source Links:

Paint:

Canvas: 
Blick Art Supplies: Gallery Style Stretched Canvas

Brushes:
I have a variety of brushes that I purchased. I used these while I was teaching and continue to use these brushes. They are quality brushes but economical.






Saturday, July 15, 2017

Watercolor Doodles


Doodling with Paint or Pens
on Watercolor Test Pages

Doodling can be so fun and relaxing. I have always been the doodler in class or meetings to keep the boredom away. I would much rather be in the studio drawing or painting.

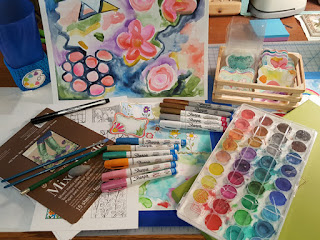
Lately, I have taken to doodling on my watercolor/color test pages. When I'm stuck about what to paint, I just fill a page with shapes and colors as you can see in the above photo.

I thought I would share my process.

Supplies I Use:
Watercolor Paper or Mixed Media Paper
Watercolor Brushes
Watercolor Paint Pans
(I use a variety of pan watercolor paints and some in tubes.)
Fine Point Black Sharpie Pens
Gold Sharpie Paint Pen
Silver Sharpie Paint Pen
Sharpie Paint Pens
(This is not a paid ad for Sharpies. I just like the brand and it is affordable. I plan to try some other brands soon.)

When painting with watercolor, I keep an extra piece of mixed media paper on the side. I use that paper to test the colors that I am using. I paint thin washes of color all over the page. The washes that I create are random.

Tip:
Leave some spaces white or barely painted. Those are the areas that can be drawn over with the pens. Using a marking pen on thicker paint tends to ruin the tip of some types of pens.

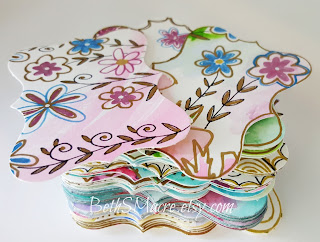
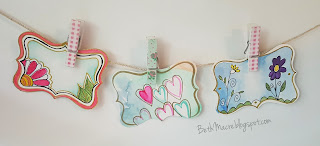
After I fill up a page of color testing, I cut them into smaller pieces. For this set of doodles, I chose a rectangular plaque shape. I purchased this paper punch last year and had not used it, so I decided to use it for this project. But these could easily be cut into any shape with scissors or an x-acto knife.

Ideas for shapes:

Paper punch shapes on hand
Bookmark style rectangular shapes
Squares (Mini square or larger)
Rectangles
Circles
Hearts

After you cut the shapes out of the watercolor test papers, bring out your favorite drawing tools or paint pens. You can use marker pens, paint pens, brush pens, colored pens or pencils. I love trying out new supplies. I am a little art supply obsessed. Especially with pens and drawing materials.

Just Doodle

Using a paint pen, I start drawing lines. Sometimes I start with a border around the edge of the paper and other times I just start drawing shapes inside. Use your own ideas and style. That is the fun part. You may want to use a sketchbook to doodle with a pen or pencil to get some ideas and variations of your ideas. I have also doodled with white pens on black art paper. You can read about it on my personal Art Journal blog here.

Once I start doodling, I get ideas for the next one. I think about what would look good with the one I am currently working on. If I don't get a new idea, I will recreate the last one except change up the direction of the shapes or change the colors, or both.

What To Do With The Finished Cards
String them up across on a Chalkboard, Bulletin Board or on your wall.
They also make great gift tags, thank you cards, name tags or accessories in planners or scrapbooks. I'm sure there are many more ways they could be used. I would love to hear your ideas! Leave your ideas in the comments below.


Get Creative
Go ahead and get creative! Experiment with watercolor and pens. If you do not have the supplies for watercolor, just use plain drawing paper or cardstock. Cut them into any shape you want and doodle with pens and markers. I plan to do the same with Acrylic paint.


Monday, February 2, 2015

A Lesson on Surrealism

Jr. High - High School Lesson                                by Beth Macre
Surrealism and Salvador Dali

This project is an introduction to Surrealism, Salvador Dali, Renee Magritte (or other Surrealist artists that you have examples of...)

Salvador Dali – ‘Persistence of Memory’ 
Known for Surrealism and his famous painting with the melting clocks. 
   For a short Bio of Salvador Dali and short video about his life, click on this link: 
             Biography: Salvador Dali
  ● For the official Salvador Dali website, Click here for: SalvadorDali.com 


"Pink"
by Beth S Macre
Assignment: Create a 
Mixed Media Collage that creates a unified theme using a variety of pictures and graphics from magazines


Steps to Assignment:
1. Go through magazines and cut out 10-20 images that:
    ● can be combined to create and tell
       a story.
    ● are interesting and colorful
    ● easy to cut out. (definite edges)
    ● graphic designs (letters shapes)


2. Choose a theme based on the    pictures that you have cut out.
    ● Brainstorm ideas with pictures.
    ● Find more pictures to complete the
       story.

3. Temporarily tape pictures onto the
    background paper (18x24 paper)
    ● Use one small piece of tape, 
       rolled inside out, to stick the
       picture down, temporarily.
    ● try different compositions before
       finalizing your design.


4. Draw the background, using outlines, in pencil:
    ● Draw lines around your magazine pictures that are taped down.
    ● Drawn background should pull all of the pictures together and tell a story
       and create a unified design.


5. Add color to background with markers (I used the large size Crayola markers)
    ● Color around your pictures that are still temporarily taped on the paper.
       It’s easier to color around them before they are glued down.
    ● Do not color underneath them, as the glue can cause bleeding through the pictures
       on some papers.


6. Glue pictures down when color is added.
    ● Remove tape carefully!  
    ● Glue either by sections, as sections are complete, or when all of the color is  
       finished.
   
Tips for Success:
Make sure that you do not lose or tear your pictures. You could draw outlines where they go (label what goes where) and remove them. 
Store the pictures in an envelope while you are working on the project. 
(We made envelopes with old dot matrix printing paper by folding and stapling the sides, or you could use gallon size Ziploc bags if you have them.)

Cut pictures out neatly, with smooth edges. 

Do not use too much glue, as it causes the paper to bubble. Glue sticks do not, but they do not stick as well. Use whatever type glue you have, but be sure they use it properly.

Vocabulary:
Surrealism         Creativity                  Theme              Collage
Salvador Dali     Graphic Design        Composition     Mixed Media

For more examples, see below:

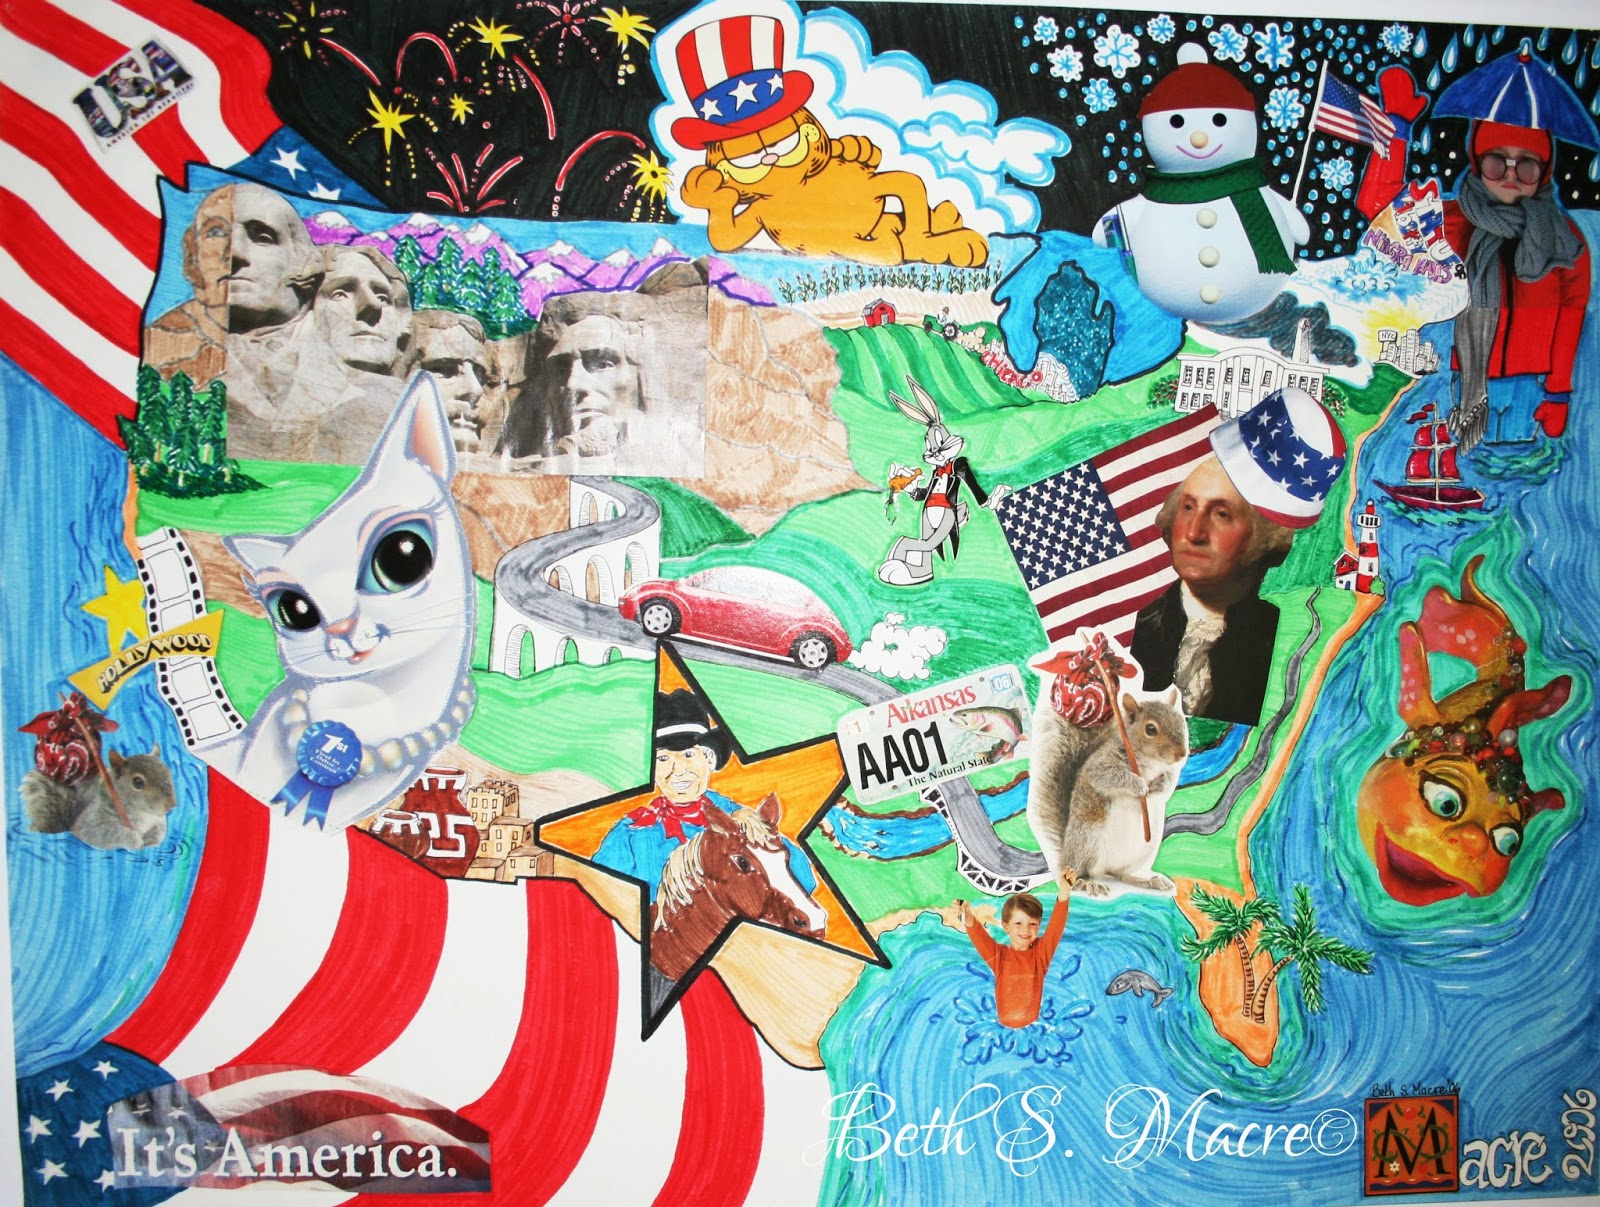
"It's America"
by Beth S. Macre
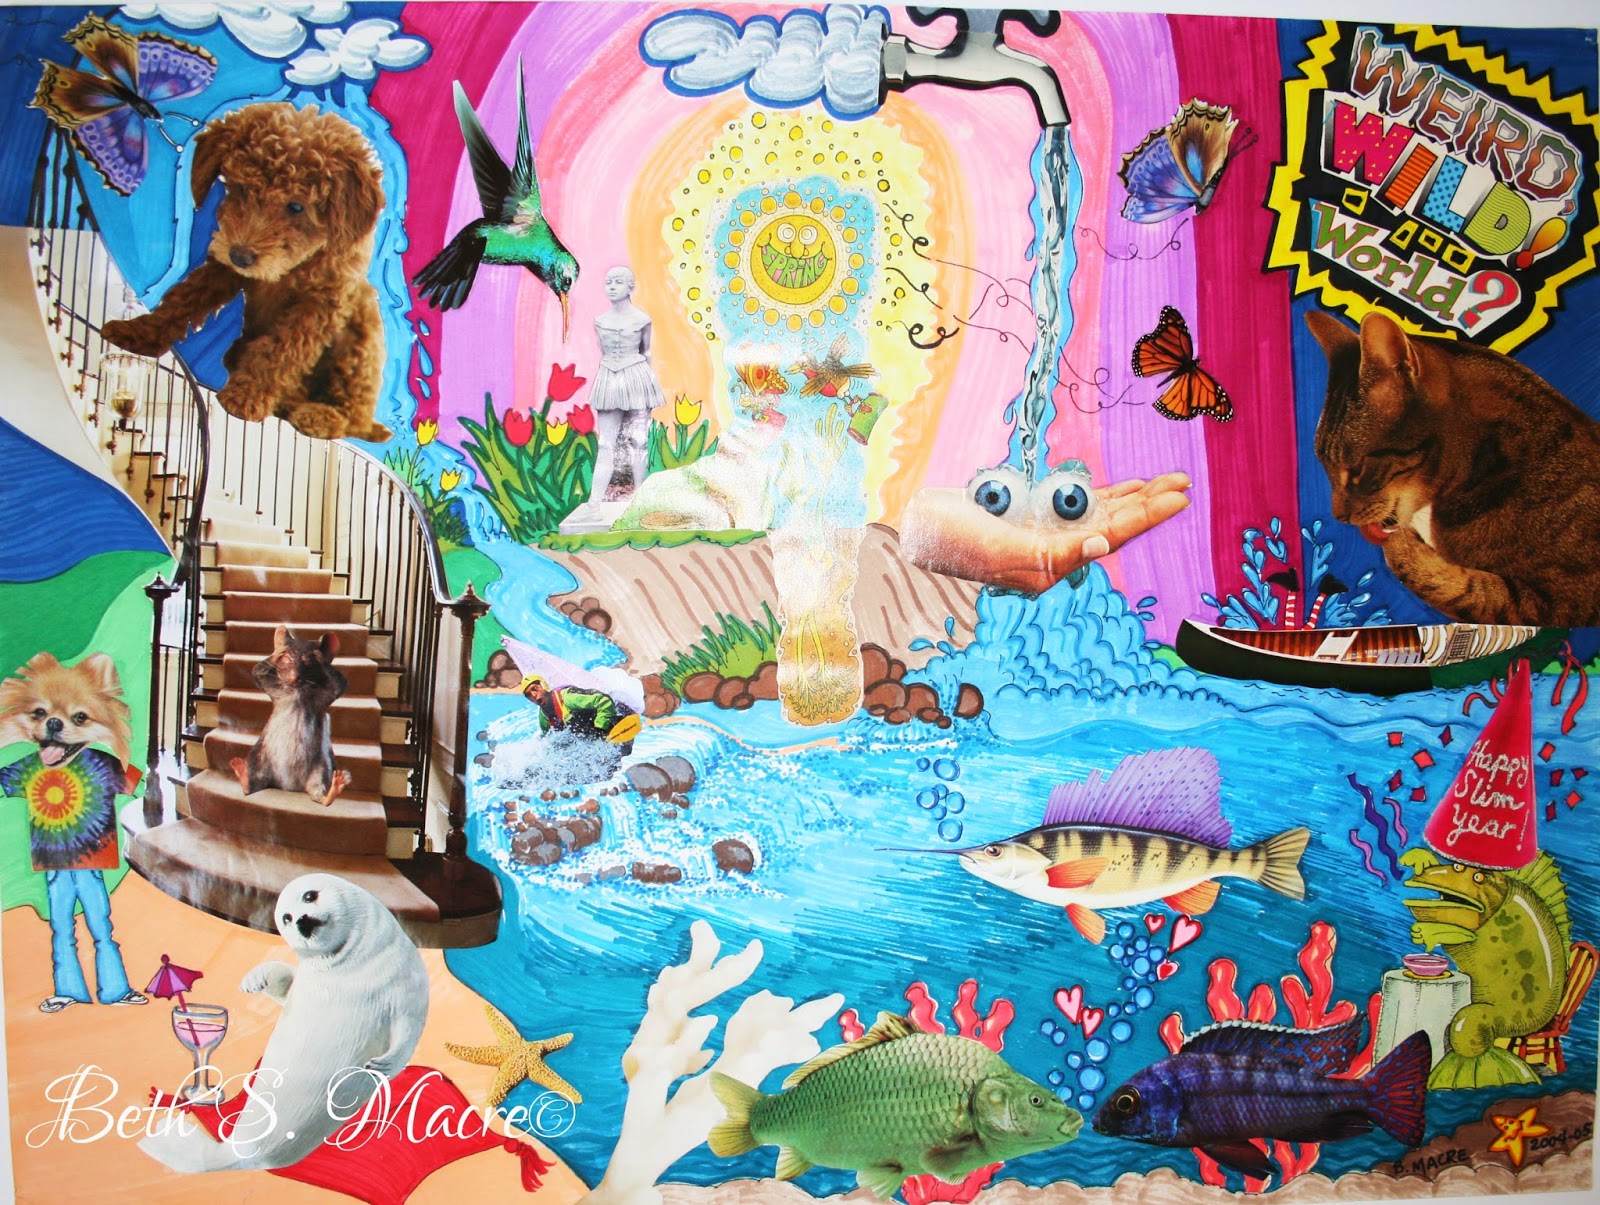
"Weird, Wild, World"
by Beth S. Macre


Mrs. Macre  Loves Art!

Friday, December 5, 2014

Relax, It's December

Hey Guys!

It's December! 

Almost time for a break for the teachers out there! Yay!!!

I know teachers are counting down the days until Christmas break! I did every year!

It was/is always a crazy busy time of year for teachers, especially art teachers.  For some teachers, the end of the semester brings a slower pace to start reviewing for end of semester exams and grade papers.  I don't know about other art teachers, but this one always had students who were working on finishing big art assignments up until the last day of finals! I always gave a deadline, but if a student was trying their best to finish up a great project in time, on top of studying for other finals, I didn't have the heart to not allow them that extra day to finish. So this always lead to me also being frazzled with grading end of semester projects and giving exams. (We were required to give a final exam...not a fan of that!)

Even though I am 'retired' (I use that term loosely), I am also in the middle of being in the busiest time of year! I am getting ready for 2 more shows, plus the commissions that I have taken on that have to be finished BEFORE Christmas!  So...

...this is my work space chaos!

Hopefully after the holidays I will be ready to create some short lessons to add to this blog!

Until then....

Breath   
Relax
Create
Relax
Repeat


 Mrs. Macre  Loves Art!

Tuesday, October 28, 2014

Mrs. Macre's Art Class

Hello! Welcome back to the art class blog! 

I haven't blogged lately because we've been busy moving across the state. But I have plans to continue adding to this blog with lesson ideas and tips for teaching art, as I can. These lessons should be helpful to current teachers, homeschooling moms, or Dads, or just budding artists who need a little extra help or tips for learning about art!

Some things that I will continue to share on the blog are:

1. Tips for working with clay.

2. 'How to' posts for creating things from clay.

3. Tips for drawing with pencil, colored pencils, and ink.

4. Tips for working with mixed media.

5. My favorite art supplies. 

6. Anything else that I find to share along the way! 


I hope you will check back often to see what I am up to and check out the older posts from my teaching years. There are some very cool projects created by some very talented high school students.


Mrs. Macre Loves Art!

Wednesday, January 2, 2013

Life as an Artist...

Mixed Styles
Beth S. Macre©2012 
...is pretty amazing!  Although I am a retired art teacher, I am still very active with my art! I would say even more so than when I was teaching. I get to do what I love every day! It has kept me busy and I have been very happy with my decision to retire, so far.  I don't have those constant student samples to share anymore, so for now, (see update below) I will not continue to add student work to this blog.  I will leave it up for the samples that I have already shared though. It was fun to write on the blog while I could.  I wish I had started years ago.  For now, enjoy my blog and enjoy your own classrooms!


UPDATE
Update: I love to try new things so I will be sharing projects and tutorials on the blog as I come across interesting projects. I will also update some of the old blog posts with more instructional tips and step-by-step photos. Check out this blog and its' archives for interesting projects or check my Pinterest page to see if there is anything you are interested in!
Here is a link to my Pinterest Page Board dedicated to this blog and links to other blogs that are related to my blog posts.
Pinterest Board: Mrs. Macre's Art Class.
My Entire Pinterest Page: Beth Macre


Mrs. Macre♥Art 

Saturday, August 11, 2012

School will be starting soon...

Plaster Masks
with Acrylic and Miscellaneous found objects


It is a very strange feeling, not thinking about lesson plans and purchasing art supplies and all of the other preparations.  But it's okay. I can still share some of the projects that I have done with my students in the past.  I still find myself pinning great ideas on Pinterest! Boy, do I wish I had Pinterest when I started teaching!  But looking at all of the great ideas art teachers have gives me inspiration for my own artwork! 

Just thought I would share some photos from projects done in my class in the past. Hope some of you will get some ideas from my assignments and make them work for you! 

These masks were made out of Plastercraft on mask molds. Students added their own details like buttons and other found objects or cutout cardboard, attached, and painted for extra details. 

We used Plastercraft like this: 
Blick Art Supplies: Blick Plaster Craft

Have a wonderful year for all of the teachers, but especially the art teachers!


Mrs. Macre♥Art

Friday, June 22, 2012

The End of School

Art 3 & 4 Last Lunch Birthday Party
Senior Going Away Party Celebration
It's been awhile since I posted last! The end of the school year is always busy, but this year was especially busy! After the District Art School, there were papers to send home, Seniors to get wrapped up (they finish a couple of weeks earlier than the rest of the 'underclassmen').  So, the usual end of school activities is very hectic...but a week before school was out, I made the decision to retire from teaching!  So 'The End of School' really means the end of school for me.  I had a lot of packing and cleaning out to do...especially after 25 years in the same room!  I feel like I was moving out of my home away from home, but that I was finally graduating to the next part of my career.  I taught Art for 29 years and it was time for me to retire.  I have been thinking about it all year, but I was afraid to make that change!  But because of a lot of changes going on around me at school, I just decided that it was time for me to move on too.  I am excited about the future.  I plan to be the full time artist that I have been trying to be while teaching, but that just doesn't work very well.  So, although this is a new path for me, it is an exciting one.  I am already busy at work creating new art and learning about the business side of art.

In this photo are the students that I had in Art 3 and 4 this year.  This was a great group of students to work with! All girls except for one boy! Javon enjoyed being the only boy in a class room full of girls, but he did get kidded a lot and had to listen to some really 'interesting' conversations! But he was a very good sport about it all! All but 2 of the students in this group graduated this year and I will miss seeing the other two in class next year. I loved this class because they were all eager to come in and create every day! They loved being in the Art room!  We also enjoyed the birthday parties. Periodically we would celebrate the birthdays and bring food items for lunch to the art room and celebrate the birthdays! This photo was from our last party of the year. I think they had a great time!

As for this blog, I will post more project ideas from this year and some from in the past. In the future, I may be teaching some other art classes privately, so I plan to use this blog for that. This blog is not going to go away. I may eventually change directions, but for now, I hope to continue to get and to give advice and ideas to/from other art teachers.

Mrs. Macre♥Art 

Sunday, April 8, 2012

Tips for working with Plastercraft


Creations with Plastercraft

Another 3 day weekend is over and we are in the last stretch of school until summer break! Seven more weeks!
The end of the year goes by so fast!
By the second semester of the year, my students begin to get bored with all of our usual supplies. We are all tired by this time of year, so it is a great time to pull out the plastercraft.

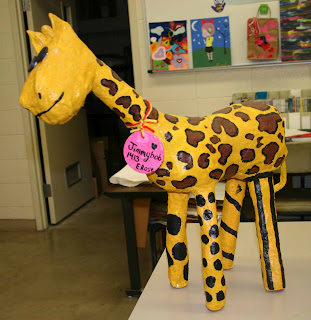
JimmyBob the Giraffe
Meet one of the 3D Plaster Sculptures that is currently decorating the Art Room. JimmyBob the Giraffe was created by Sam (Samantha). JimmyBob was formed out of a lot of rolled up newspaper. You can see in the second photo how Samantha is adding layers of Plastercraft to the legs of her sculpture.

Preparation Tips for Teachers

1. Size of class matters. 
I teach this lesson to my Art 3 students. Mainly because it is always a smaller class than my Art 1 and Art 2 classes. It is easier to manage the mess and these supplies can get expensive with a large class.

2. Collect Recyclables.
Start a collection of paper towel and toilet paper tubes, newspaper, empty containers made of cardboard. These items can be used to form the foundation of your student's sculptures.
Empty plastic ice cream containers are great for carrying water to student work spaces. I may or may not have eaten lots of ice cream to contribute to this collection.
Let other teachers know what supplies you need. Maybe they can save you from over indulging in ice cream. ;) 

3. Keep a sketchbook.
Have students keep a sketchbook to sketch out their ideas for projects. They should use those sketches to plan the shapes that are needed to put together their sculpture. 

4. Buy masking tape in bulk.
Have plenty of masking tape to tape the shapes together as they are formed. I always purchased masking tape in bulk. It will be used for many projects. 

5. Buy Plastercraft in a large package. 
One small roll does not go very far. I purchase a large box similar to this photo. Whatever you do not use can be used next year. This is a picture of the type I purchased.


For more tips and techniques for using the Plastercraft., visit this post here:
   Up to Our Elbows in Newspaper, tape, and plaster

Now start collecting those paper towel rolls and ice cream buckets!


Mrs. Macre♥Art     


Saturday, March 24, 2012

Finished Plastercraft Sculpture Update

Finishing Projects
Spring Break is almost over and we are into the last quarter of the school year...already! This year is going by very quickly and the last quarter always goes by even more quickly because of the end of year testing and graduation activities and getting ready for our district Art Show!

My trusty computer suddenly died recently. It had my photoshop program on it, so I haven't updated the blog because I feel lost on this borrowed computer without my photoshop.  I downloaded a preview of a newer version of photoshop so I can do some editing and posting.  I'm still trying to post the results of our plaster sculptures.

Here is the owl and Pink Dog that I created for the project samples and demonstration.

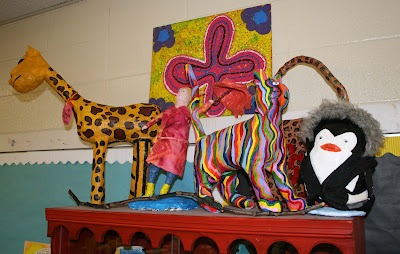
The Turtle, Giraffe, and Penguin are all created this year by some of my students in Art 3.

To see the project from the beginning, check it out here:
Up to Our Elbows in Newspaper and Tape


                Mrs. Macre♥Art 

Sunday, February 19, 2012

3D Plaster Sculptures Complete

Sculpture in the Art Room

The Sculptures from my Art 3 and 4 class are finished and I've been taking photos and editing the photos. I will include a few examples of the finished pieces in this post and a few more in the next post.  Both the students and I enjoyed this project.  They all come up with a variety of ideas and must come up with their own technique for creating their idea from the form to the final painting.  The students are good about sharing suggestions, so they work well together as a class.  The students in my Art 2, 3 and 4 classes are made up of students who REALLY want to create and try new things.  They make my day!

To see the work in project pictures, check them out here:
Creating the Forms
Plastering
More Finished Projects


Hayley's Peace Sign


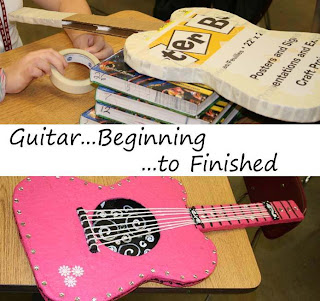
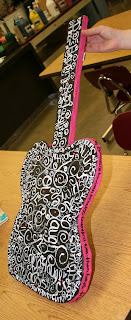
Bridgette's Pink Guitar - back side

Mrs. Macre♥Art